Teachers: Khan-style online tutorials go 2.0 with new technology


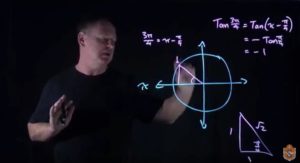
Khan Academy-style tutorials go 2.0, humanizing online learning thanks to the LightBoard.

Video tutorials in the style made famous by Sal Khan of the Khan Academy changed the face of education, empowering anywhere, anytime learning. However, they were Tutorials 1.0. We now have Tutorials 2.0. The LightBoard has arrived.

A Giant Leap Forward to More “Human” Online Learning

This next stage of evolution of tutorials allows students to get an enhanced experience with a more personal connection between the student and the teacher. Students no longer view only writing with a disembodied voice. They now get to see their teacher, complete with facial expressions, gestures and all the “human” things that make person-to-person explanations appealing. While nothing can replace a one-to-one, face-to-face explanation, this is better than anything in the past.

This type of tutorial is simple to make; any teacher who can stand at a board, write with a standard marker and explain a concept can now make tutorials—no digital pens and touch-enabled devices needed, and almost no technical knowledge required.

Video of Patrick Dare, a Mathematics teacher at Saint Stephen’s College, explaining some theory in a video tutorial created using the LightBoard:

That’s because the LightBoard is a sheet of glass flooded internally with light. The teacher stands at the “board” and writes with colored markers as a camera records the tutorial.

Creating the LightBoard Environment

I initially heard about this concept at a conference, and then developed the board in stages:

1. Research–There is plenty of information on the internet. The information provided by Michael Peshkin from Northwestern University at lightboard.info is really valuable. It was our guide. He provides all the information you will need, from materials and design through to lighting and tips for use.

2. Materials and cost–We then took the design information and built a list of materials to estimate costs:

  • The “extras”–things needed to support the recording of the LightBoard–were relatively easy to source. Their cost was a few hundred dollars. We purchased LED strips for the top and bottom of the board, LED studio lighting, a studio microphone, black material to line the walls of the recording area and more. All are available online. Our school already had a suitable video camera that accepted an external microphone.
  • The LightBoard itself required more effort. We decided to make our board about the size of a 65-inch television. However, a piece of glass of that size required dealing with a glass specialist. After a bit of searching, we found a company that was happy to take the design information from lightboard.info to supply the special formula glass, build a custom stand, mount the glass on the stand, and add metal channels at the top and bottom of the board through which we could thread the LED strips needed to flood the glass with light. This process from start to finish took several weeks as it was a custom build, and was a new experience for both the glass supply company and my school. The sheet of glass is mounted professionally on a stable custom made aluminium frame, and the cost was a few thousand dollars.
  • The recording area needs to be in a separate room. A LightBoard is not something that can be moved from room to room easily, and equipment (lighting, microphones, video camera, a black backdrop, curtains etc.) needs to be positioned optimally and then left in place. Finding a spare room may be a problem for some. Luckily, we have been building an organization-wide online learning environment for over five years and filming tutorials by teachers in some form was always on the agenda.
The LightBoard, showing part of the custom-built stand, the black backdrop and one of the studio lights. The directional microphone is visible on the bottom right of the photo. The black lines visible at the top and bottom of the sheet of glass are metal tubes that are glued in place. They each provide a channel in which an LED strip sits.

(Next page: LightBoard implementation and Outcomes)

3. Implementation–While everything was fine in theory, reality requires fine tuning:

  • The original glass looked perfect. However, once flooded with light, some subtle flaws were revealed inside the glass. (Glass was never meant to be flooded with this amount of light.) Luckily our supplier was understanding and replaced the sheet with another formula. It is excellent.
  • Handling and care are important. Even a small scratch becomes obvious.
  • Lighting of the teacher takes some experimentation to get right. We are still working on this, but the results so far are quite good.
  • Blackout curtains in appropriate locations may be important, depending on the structure of the room. We added more to our walls to reduce reflections on the glass and to control lighting of the teacher.
  • A suitable microphone is important, as high-quality audio is vital. We bought a directional external microphone which sits on a tripod at the side of the board. It is working well, but we are still experimenting.
  • Glass is difficult to clean, and smudges can be visible in a video when the glass is flooded with light. We experimented with a range of cleaners and a microfiber glass cleaning cloth seems to work well.
  • The tips provided at lightboard.info have also been very useful.

4. Production–Our goal was to allow teachers to teach and not have to think about the technology. Thus, all a teacher must do is walk into the recording room, press the record button on the camera and “teach”. Once completed, the teacher presses the button on the camera to stop recording. We then have a member of the eLearning team trim the recording to show only the tutorial, and to rotate the recorded image 180 degrees using video editing software. This is an easy process. We use Camtasia, but it is possible using other software. We then post it into the appropriate course in our Online Learning Environment. Of course, teachers with some technical knowledge may choose to do the editing themselves.

5. Lower cost alternatives—It is also possible to build a less expensive LightBoard. Sites such as this from Estrella Mountain Community College provide details.

A later version of the recording room. Extra blackout fabric has been added to reduce reflections and control lighting. You may not need this.

An Effective, Efficient, Personal and Easy-to -Use Outcome

While the process of building the LightBoard and setting up the recording area has taken a couple of months and has cost a few thousand dollars, it has been worthwhile. It has taken our online tutorials to another level that is more appealing to students. Anywhere, anytime learning and revision is now even easier, and our online learning environment is more “human” than it has been in the “disembodied past”.

Sign up for our newsletter

Newsletter: Innovations in K12 Education
By submitting your information, you agree to our Terms & Conditions and Privacy Policy.

IT Campus Leadership

Your source for IT solutions and innovations to support campus-wide success. Weekly on Wednesday.

  • Hidden
  • Hidden
  • Please enter your work email address.
  • Hidden
  • Hidden
  • Hidden
  • Hidden
  • Hidden
  • Hidden
  • Hidden
  • Hidden
  • Hidden
  • Hidden
  • Hidden
  • Hidden
  • Hidden
  • This field is for validation purposes and should be left unchanged.